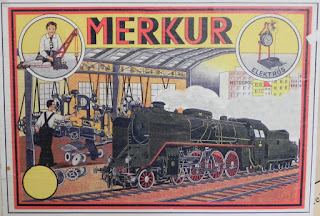
Yesterday, I had a couple of hours of spare time in Amsterdam, so I drove to Harlaar. It is the LHS of our capital and it is tucked away in a neighbouring village that is pretty much enclosed by the metropolitan ambitions of its neighbour. Since I dislike traffic jams under an unforgiving sun, it was quiet a challenge to get there. The whole village appears to be connected to one bridge over a canal, and obviously this bridge was open both times I had to cross it. The shop is hidden in a residential area, they had quiet a lot of Märklin, Fleischmann, Roco in half zero and N on display, so I enjoyed myself. The old man explained me how to wire my semaphores with Reed switches and relays, I found a few old Dutch decals for signs and ads, so i was happy.
Today, it was too hot and humid to do any normal work. So, I decided to play with my layout and gave the new Merkur 9967 goods shed a decent place along the tracks.Again this Merkur structure is constructed with many screws and nuts. The window bars are fitted with slots and tabs. The sliding door can open and close. I like the colour, as it fits in great with pre-war trains.
Additionally I glued a Moba-Art 120100-I laser-cut small shed together and I must admit that it was nice and easy to build.
In the end, I soldered the internal lightening system from Conrad 240863-89 together LED strips 219707-89 and fitted it in my Merkur passenger coach. It indeed produces a constant light emission at variable potentials given to the tracks, but the light strength is a bit disappointing in scale zero, so I probably have to go find some better LED's to do the job.
Sunday, August 30, 2015
Friday, August 28, 2015
Merkur Museum
During our holiday in the Czech Republic we visited the Merkur museum in Police nad Metuji. We had to drive for two hours through the Giant's mountains and the Eagle's mountains through very small villages to arrive in a small industrial town close to the Polish border. The museum itself is situated on a park like square a few hundred meters from the central town square.
The building appears to be an old school building. Most of the museum is devoted to the construction sets of Merkur and what you can possible build with them.
Some folke like to build houses.
While others prefer the Valdstein castle.
But an old city hall is also nice.
This small truck is quiet fancy as well.
There is also the red monster thing that fits into a complete room. It is a kind of fair ground attraction for a small train that runs through it. A bizarre creation, all made from construction sets.
Fortunately for me, there were also two train rooms with trains running smoothly over the layouts.
The display cabinets in the train rooms held several treasures for me. Below you can see some old pre-war Merkur trains.
Four cabinets had beautiful trains, but due to light reflections, they were difficult to photograph. Below are ETS trains in the back, and old trains in the front that I did not recognise.
This large cabinet is filled with pre-war Merkur trains.
Another display with old toy trains that I do not recognise, but nice to see.

In the side street next to the museum is the entrance to the Merkur factory.
Of coarse I purchased a small souvenir in the museum shop on my way out. It is a small good shed from Merkur and will fit nicely in my layout. The Czech grandmother in the shop has hardly any stock displayed and most of it locked in cabinets, so I pointed to a few things that I would like to buy and in the end bougth something she had.
The building appears to be an old school building. Most of the museum is devoted to the construction sets of Merkur and what you can possible build with them.
Some folke like to build houses.
While others prefer the Valdstein castle.
But an old city hall is also nice.
Others build huge pillars that can only fit in the central hall.
But this enormous railway bridge is my favorite. So, large that it couldn't fit in the museum and had to be placed in pieces.This small truck is quiet fancy as well.
There is also the red monster thing that fits into a complete room. It is a kind of fair ground attraction for a small train that runs through it. A bizarre creation, all made from construction sets.
Fortunately for me, there were also two train rooms with trains running smoothly over the layouts.
The display cabinets in the train rooms held several treasures for me. Below you can see some old pre-war Merkur trains.
Four cabinets had beautiful trains, but due to light reflections, they were difficult to photograph. Below are ETS trains in the back, and old trains in the front that I did not recognise.
This large cabinet is filled with pre-war Merkur trains.
Another display with old toy trains that I do not recognise, but nice to see.

This display cabinet has modern Merkur trains and all types of prototypes.
On the walls old advertisements and newspaper stories were displayed. I really liked the old pre-war Merkur ads.
In short, the museum is located in a beautiful mountainous region it has several amazing structures and some beautiful trains. Personally, I would have appreciated a little more explanation regarding the old and peculiar trains. In the side street next to the museum is the entrance to the Merkur factory.
Of coarse I purchased a small souvenir in the museum shop on my way out. It is a small good shed from Merkur and will fit nicely in my layout. The Czech grandmother in the shop has hardly any stock displayed and most of it locked in cabinets, so I pointed to a few things that I would like to buy and in the end bougth something she had.
Monday, August 24, 2015
New Paya spare buffers
A few weeks ago, I received two sets of new spare Paya buffers from Bruce Palmer. Bruce has cast many different Paya spares with the original moulds, including buffer heads, shanks, bogie side frames, etc. Since, I had no Paya coach with a complete set of buffers, I ordered and received two sets of new buffer heads. Since these spare parts are made from a low temperature melting metal alloy, soldering them is not recommended, instead I used an epoxy glue and that worked fine.
The photo shows the three Paya 987 passenger coaches with a new Paya spare buffer on the left and an old original Paya buffer on the right. I am quiet pleased with them. Thank you, Bruce!
The photo shows the three Paya 987 passenger coaches with a new Paya spare buffer on the left and an old original Paya buffer on the right. I am quiet pleased with them. Thank you, Bruce!
Thursday, August 06, 2015
Adding interior to a Merkur passenger car
Today I visited Blik & Speelgoed and purchased a passenger car interior (8961) for Merkur passenger car 9330. Under an unforgiving hot sun, we went home and assembled the interior after sunset in slightly better temperatures.
Here are the two parts prior to the merger.
Unscrewing six screws and the roof was removed. This clarified that I had to unscrew another six nuts for retaining the interior. This flexible metal interior was fairly difficult to get inside, so I loosened another 5 nuts to loosen a side panel and then the interior flipped into place. So, then I had to tighten the nuts of the side panel again.
Then the six screws and nuts through the bottom plate and the interior and then the lot was secured.
So, finally the passengers are able to sit down and relax. So, after this close encounter with all them nuts, screws and washers, I do know that these Merkur cars are decently constructed and making modification is fairly straightforward.
Wednesday, August 05, 2015
Miniworld
Yesterday we visited Miniworld in Rotterdam. Its entrance is conveniently located on about one third mile west of the Central Railway station of Rotterdam. It has the surface area of a sport hall and is chuck full with model trains. Dutch model trains to be more precise. They recreated parts of Rotterdam city, the harbour and near-by locations like Dordrecht and Zeeland.
The pictures below show some great modelling work done in half zero two rail, so probably based on Fleischmann and Roco rail and model train systems.
In the lower gallery of this great building a convenient Subway was located and since we were hungry after our visit, it served us well.
 |
| The entrance to Miniworld Rotterdam |
To show the size of the layout, here is a picture with one of the overviews. Since, the Netherlands is predominantly a flat country, the modelling is relative easy.
About every 20 minutes in turns night in Miniworld and the sunset and sunrise render excellent photo opportunities.
 |
| Martinus Nijhoff bridge in Miniworld during sunset. |
 |
| Rotterdam police office at night |
There are quiet a few accidents in Miniworld happening simultaneously, which suggests that the drivers are relatively reckless.
 |
| An underpass too low at Miniworld |
The good observer will spot that retired Dutch cows are enjoying their pensions at Miniworld, which is quiet a difference from the more common slaughterhouses in the real world.
Rotterdam Central Station is well-modelled at Miniworld, also the adjacent 'Great trade building' is well done. The latter building is a landmark of Rotterdam's resurrection in the early post-war years.
In the lower gallery of this great building a convenient Subway was located and since we were hungry after our visit, it served us well.
Subscribe to:
Comments (Atom)


