I just finished converting my small electrically ETS 102 rectifier from 2 rail to 3 rail operation.
This engine is from 1996 and it used to ran fine on brass ETS rails, but now that I have finished my new layout with Merkur rails, I decided to convert it to 3-rail operation. Therefore, I needed to disassemble the engine. This involves sliding the roof of, loosening the two top-light LED's from their fittings and removing two screws that hold the engine-block to the bottom plate.
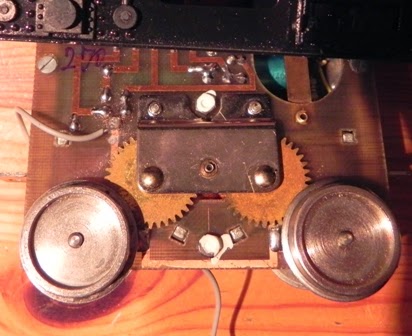
The new 3 rail pick-up assembly is from Merkur. A small pine wooden plate was made in which the 3-rail pick-up assembly fits tightly, which in turn fits tightly in the underside of the engine.
A connecting orange wire was soldered between the electrical pick-ups of the left and right wheels. The connection between the wheels and the engine was disengaged by cutting though the print-plate and soldering a new grey wire between the loose connection and the 3 -rail pick-up.
Below, you see the new grey wire to connect the 3-rail pick-up and below the soldering point is the broken connection to the wheels.
And after assembly the engine run fine on 3 -rails with DC power from an ETS transformer.